Category: Dessert

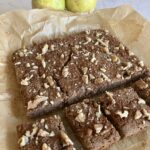
  • WFPB Flapjacks

    WFPB Flapjacks

    Print
    5 from 1 vote

    WFPB Flapjacks

    In the UK, “flapjack” refers to a sweet oat bar traditionally made with butter, sugar, and golden syrup, quite different from the North American pancake we associate with the same name! These WFPB Flapjacks are a nourishing twist on the classic European treat, made entirely from whole-food, plant-based ingredients with no added oils or refined sugars. Think of them as a naturally sweet, chewy oat bar that’s perfect for breakfast, snacks, or an on-the-go energy boost.
    Course Breakfast, Dessert, Snack
    Total Time 35 minutes
    Servings 16
    Calories 115kcal

    Equipment

    • 1 Food Processor

    Ingredients

    • 1 Apple
    • 3/4 cup Cashews
    • 1 cup Pitted Dates loosely packed
    • 1 1/2 cups Oats
    • 1/2 cup Unsweetened Shredded Coconut
    • 1 tsp Vanilla Extract

    Instructions

    • Place the dates and cashews in a bowl and cover with boiling water. Soak for 10 minutes. Drain, reserving the soaking liquid.
    • Preheat the oven to 400°F (200°C) and line an 8×8-inch baking pan with parchment paper.
    • Core and chop the apple (no need to peel).
    • In a food processor, combine the apple, cashews, dates, vanilla, and 2 tablespoons of the reserved soaking liquid. Process until fairly smooth.
    • In a large mixing bowl, combine the oats and shredded coconut. Add the fruit and nut mixture and stir until well combined.
    • Spread the mixture evenly into the prepared pan, smoothing the top.
    • Bake for about 20 minutes, or until the edges are crisp and the top is golden.
    • Let cool completely before cutting into pieces

    Notes

    Optional add-ins
    Try adding cinnamon, cardamom, or a handful of chopped nuts or dried fruit to vary the flavour and texture.
    Soaking water
    Don’t discard the cashew-date soaking water! It’s naturally sweet and nutrient-rich, perfect for using in chia pudding, overnight oats, or smoothies for extra flavour and nutrition.
    Texture tip
    For chewier flapjacks, bake for a slightly shorter time; for firmer, crispier edges, bake a few minutes longer.
    Storage
    Store in an airtight container in the refrigerator for up to 5 days, or freeze for longer storage. Delicious chilled or lightly warmed.
  • Cinnamon Bun Filling

    Cinnamon Bun Filling

    Cinnamon Bun Filling

    Made these beauties today, and I couldn’t be more excited! They’re WFPB and gluten-free. The dough is a buckwheat–sorghum sourdough base, and the filling is a cozy mix of apples, mulberries, and a touch of maple syrup. I also added a thin layer of almond butter on the rolled out dough before spreading on the apple-cinnamon mixture, it makes the buns extra gooey and satisfying.
    I’ve been working toward a tasty GF, WFPB cinnamon bun for years, and this recipe finally delivers. The best part? This filling will work beautifully with any cinnamon bun dough you like, not just sourdough or GF.

    Ingredients

    • 2 cups peeled, finely chopped apples
    • ¼ cup dried mulberries
    • 2 tablespoons maple syrup
    • 3 tablespoons water
    • 1 tablespoon arrowroot flour
    • 2 teaspoons ground cinnamon I used 1 tsp of cassia, 1 tsp Ceylon
    • 3 tablespoon almond butter

    Instructions

    • In a medium saucepan combine the apples, mulberries, maple syrup, and 2 tablespoons of the water. Bring to a boil, reduce heat, cover and cook for about 5 minutes, stirring occasionally, until the apples are softened and beginning to break down.
    • Remove the lid and stir in the arrowroot flour, cinnamon, and 1 tablespoon of water. Cook and stir for 1 minute more, until slightly thickened. Remove from heat and let cool slightly.
    • To assemble the buns, spread the almond butter evenly over the rolled out dough. Spoon the cooled apple mixture on top and spread evenly. Roll up dough, let rise and bake as directed.
    • (Optional: About 5 minutes before the buns are finished baking, remove them from the oven and brush with an additional 1 tablespoon of maple syrup. Return to the oven to set the glaze.)

    Notes

    Apple texture: After about 5 minutes of cooking, the apples should be soft and beginning to break down. If you prefer chunkier filling, reduce the cooking time slightly.
    Mulberry swap: Dried mulberries add natural sweetness and a caramel-like flavour, but raisins, currants, or chopped dates also work well.
    Nut-free option: If you’d like to keep this recipe nut-free, swap the almond butter for sunflower seed butter or simply skip this step.
    Sweetness level: The filling is lightly sweetened. For a sweeter bun, add an extra tablespoon of maple syrup or a handful of chopped dates.
    Make-ahead tip: The apple filling can be made 1–2 days in advance and stored in the fridge. Bring to room temperature before spreading on dough.
  • Fluffy Pear & Cinnamon Cake

    Fluffy Pear & Cinnamon Cake

    Fluffy Pear & Cinnamon Cake

    Cozy up with this tender pear and cinnamon cake, a wholesome treat that celebrates autumn’s softer side. Bruised or perfectly ripe pears melt into the batter, adding natural sweetness and moisture, while whipped aquafaba keeps every bite light and fluffy. Free of gluten, dairy, and refined oils, it’s a lovely dessert or afternoon snack – warm, fragrant, and satisfying, just right for a crisp fall day.

    Ingredients

    • 1/3 cup Aquafaba
    • 1/2 cup Pear peeled and mashed, one large pear
    • 1/3 cup Unsweetened Applesauce
    • 1/4 cup Date Paste or maple syrup
    • 1 tsp Vanilla Extract
    • 1 cup Oat Flour
    • 1/2 cup Almond Flour
    • 1 tsp Baking Powder
    • 1/2 tsp Baking Soda
    • 1 tsp Cinnamon
    • 1/4 tsp Nutmeg optional
    • 1/4 tsp Ginger optional

    Instructions

    • Preheat oven to 350 °F. Line an 8-inch square with parchment.
    • In a clean bowl, whip the aquafaba with a hand mixer or whisk until soft peaks form (2–3 min).
    • In another bowl, stir together the mashed pear, applesauce, date paste or maple syrup, and vanilla.
    • Whisk the oat flour, almond flour, baking powder, baking soda, cinnamon, optional nutmeg, and ginger in a separate bowl.
    • Fold the dry mix into the pear mixture just until no dry flour shows.
    • Gently fold in the whipped aquafaba in two additions, keeping as much air as possible.
    • Spread the batter evenly in the prepared pan.
    • Bake 28–34 min, until golden and a toothpick inserted in the centre comes out clean.
    • Cool at least 15 min before slicing.

    Notes

    Nut free option
    Swap the almond flour for oat flour.
    Topping
    Before baking, sprinkle the top with extra cinnamon or a few walnut pieces.
  • Granola Bars

    Granola Bars

    Granola Bars

    Makes 16 servings

    Ingredients

    • 1 cup pitted dates
    • 1 1/2 cups oats
    • 1/2 cup almond flour
    • 1/2 cup unsweetened shredded coconut
    • 1/4 cup ground flax seed
    • 1/4 cup pumpkin seeds raw
    • 1/4 cup sunflower seeds raw
    • 1/4 cup hemp seeds
    • 1/4 cup blackstrap molasses
    • 1/4 cup almond butter
    • 1/4 cup unsweetened applesauce
    • 2 tsps cinnamon
    • 2 tsps vanilla

    Instructions

    • Preheat your oven to 350°F (175°C). Line an 8×8-inch baking pan with parchment paper.
    • In a food processor, add the pitted dates and process until they are chopped into smaller pieces.
    • Add the oats, almond flour, shredded coconut, ground flax seed, pumpkin seeds, sunflower seeds, hemp seeds, cinnamon, and vanilla extract. Pulse until the mixture is roughly combined.
    • Add the blackstrap molasses, almond butter, and applesauce. Process until the dough is fully combined and begins to form a ball. Scrape down the sides as needed.
    • Transfer the dough to the prepared pan. Using wet hands, press it evenly into the pan.
    • Bake for 20–25 minutes, or until the edges are just turning golden brown.
    • Allow to cool completely in the pan before cutting into bars.

    Notes

    Customize with Extras: Before transferring the dough to the pan, stir in up to ½ cup of add-ins. Chocolate chips are a favorite, but dried fruit like goji berries, raisins, or cranberries, or cacao nibs for a less sweet option, work beautifully too.
    Easier Cutting: Let the bars cool completely before slicing to help them hold their shape. A sharp knife or bench scraper works well for clean cuts.
    Storage Suggestions: Once cut, wrap each bar individually in parchment or reusable wraps. Store them in an airtight container in the fridge for up to 1 week, or freeze for up to 2 months. They’re perfect for a quick grab-and-go snack!
  • Nutty Oat Bliss Balls

    Nutty Oat Bliss Balls

    Nutty Oat Bliss Balls

    Sometimes, we all need a little bliss—and these no-bake bliss balls deliver just that. Packed with wholesome ingredients and naturally sweetened, they’re the perfect bite-sized treat to satisfy your sweet snack craving.

    Ingredients

    • 1 cup pitted dates Medjool preferred
    • 1/2 cup pecans
    • 1/2 cup walnuts
    • 1/2 cup unsweetened shredded coconut
    • 1/2 cup peanut butter
    • 1 cup oats
    • 1/4 cup ground flax seed
    • 1/3 cup soy milk or other plant-based milk
    • 1 tsp vanilla extract
    • 2 ozs dark chocolate chopped

    Instructions

    • In the bowl of a food processor, add the pitted dates and nuts. Process until the mixture is broken down into small pieces and becomes sticky.
    • Add the coconut, peanut butter, oats, flaxseed, and vanilla. Process again until the mixture looks uniform.
    • Add the soy milk and continue processing until the mixture comes together—it should be moist and hold its shape. Add more milk if needed to achieve this consistency.
    • Remove the blade and stir in the chocolate chunks.
    • Roll the mixture into 1-inch balls and place them on a parchment-lined plate. If desired, coat the balls in a topping such as cacao powder or shredded coconut. Refrigerate for about 1 hour, or until firm.

    Notes

    Leftovers: These can be stored in the fridge for up to two weeks or frozen for up to 3 months
    Add-ons: Instead of the dark chocolate chunks, feel free to sub 1/3 cup chocolate chips or goji berries or dried mulberries.
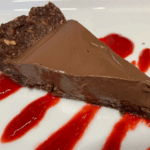
  • Chocolate Mousse Pie

    Chocolate Mousse Pie

    Chocolate Mousse Pie

    Looking for a rich, creamy, and indulgent dessert that’s also packed with wholesome ingredients? This Chocolate Mousse Pie is the perfect treat! With a naturally sweetened nut-and-date crust and a luscious, velvety chocolate filling made from silken tofu and cashews, this dessert is both satisfying and nourishing. Whether you’re serving it for a special occasion or just craving a chocolate fix, this no-bake pie is easy to make and sure to impress.

    Ingredients

    Crust

    • 1 cup raw almonds
    • 3/4 cup raw pecans or walnuts or a combination of both
    • 1 cup pitted dates
    • 3 tbsp cacao powder

    Mousse

    • 1 cup silken tofu
    • 1/2 cup raw cashews soaked
    • 1/2 cup plant-based milk
    • 1/2 cup dates pitted
    • 1/8 cup pure maple syrup
    • 1/3 cup cacao powder
    • 1 tsp vanilla extract

    Instructions

    • For the crust:
    • Place the almonds in a food processor and pulse briefly until fine and crumbly.
    • Add the remaining crust ingredients and process until the mixture becomes sticky, scraping down the bowl as needed.
    • The mixture should stick together when pressed with your fingers. If it’s still a little dry, add a teaspoon of water and process again.
    • Transfer the mixture to a pie plate and press evenly into the pan.
    • For the mousse:
    • Place all the filling ingredients in a high-powered blender and blend until completely smooth, ensuring no texture of dates or cashews remains. Scrape down the blender several times as needed.
    • Pour the filling into the crust and smooth the top with a spatula to distribute it evenly.
    • Refrigerate for a couple of hours (or overnight) to set.

    Notes

    For a less intense chocolate flavour, cocoa powder can be substituted for the cacao powder.
    Since Medjool dates are expensive, I used soaked baking dates for the crust and reserved Medjool dates for the mousse.
    This pie is great served with a topping of pureed raspberries.
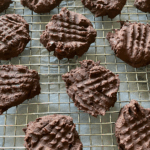
  • Double Chocolate Cookies

    Double Chocolate Cookies

    Double Chocolate Cookies

    These soft, fudgy cookies are made with beans, dates, banana, flax, and hemp hearts, making them a nourishing treat with plenty of plant-based goodness. You'd never guess there's a serving of beans hiding inside!
    Servings 24 cookies

    Ingredients

    • 1 cup kidney beans, drained adzuki beans work well too
    • 1 cup dates, pitted If your dates are firm or dry, soak them in hot water for 10 minutes, then drain well.
    • 1 large banana
    • 3 tbsp ground flax seeds
    • 3 tbsp hemp hearts
    • 1/3 cup cacao or cocoa
    • 1/2 cup quinoa flour or oat or almond flour, see note below
    • 1/3 cup chocolate chips or sub chopped nuts, goji berries, cacao nibs, etc.

    Instructions

    • Preheat the oven to 350°F (175°C). Line a baking sheet with parchment paper or a silicone baking mat.
    • In a food processor, combine the kidney beans and dates. Process until fairly smooth and uniform, scraping down the sides as needed.
    • Add the banana and process until smooth.
    • Add the ground flax seeds and hemp hearts and blend until well incorporated.
    • Add the quinoa flour and cacao powder and pulse just until combined. Avoid over-processing.
    • Remove the blade and bowl from the food processor and stir in the chocolate chips.
    • Using two teaspoons, drop spoonfuls of dough onto the prepared baking sheet. The dough will be quite soft. Flatten each cookie using a damp fork, making a crisscross pattern.
    • Bake for 12–15 minutes, or until the cookies look set around the edges.
    • Allow the cookies to cool on the baking sheet for several minutes before transferring them to a cooling rack. They are very soft when they first come out of the oven and will firm up as they cool.

    Notes

    Choosing your dates
    The type of date you use will affect the sweetness of the cookies. Sayer dates have a milder sweetness, while Medjool dates are larger, softer, and naturally sweeter. If using smaller dates, you may need a little more than 1 cup to achieve the same level of sweetness.
    Quinoa flour substitution
    If you don’t have quinoa flour, oat flour is my first choice. It has a mild flavour and works well in these cookies. You can make your own oat flour by blending rolled oats until finely ground. Almond flour can also be used, although the cookies will be somewhat softer and more tender. If using almond flour, start with the same amount and adjust slightly if the dough seems unusually wet.
    Getting the right texture
    The dough is naturally soft and sticky, so don’t be concerned if it doesn’t look like traditional cookie dough. A damp fork makes it much easier to flatten the cookies without sticking.
    Mix-ins
    Have fun with the add-ins! Chocolate chips are delicious, but chopped walnuts or pecans, cacao nibs, goji berries, or other dried fruit can all be used. You can also combine a couple of different additions.
    Storage
    Store cooled cookies in an airtight container in the refrigerator for up to 5 days. They can also be frozen for longer storage.  
    A little nutritional boost
    Beans, flax seeds, hemp hearts, and cacao contribute fibre and plant-based protein, while flax and hemp hearts also provide unsaturated fats. The combination makes these cookies a more nourishing option than a typical sweet treat.
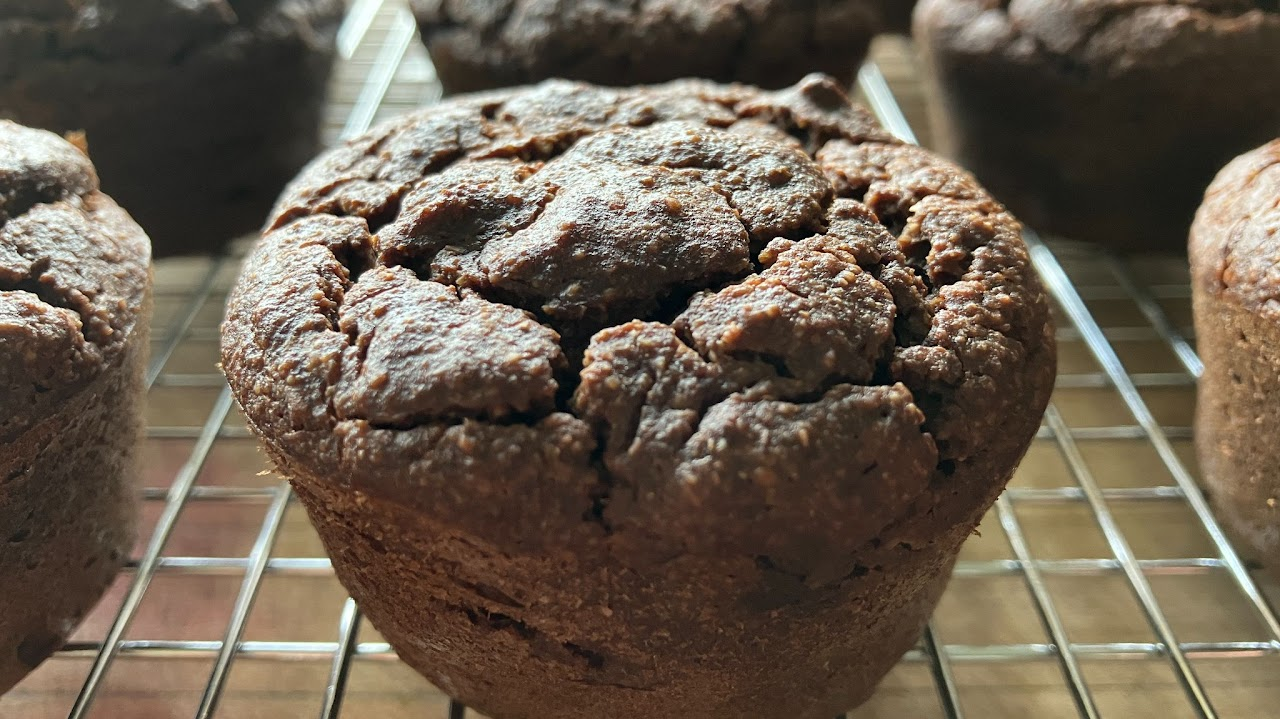
  • Four-Bite Brownies

    Four-Bite Brownies

    Four-Bite Brownies

    Looking for a rich, fudgy brownie that’s both delicious and packed with nutrients? These brownies (which were named by my husband) are made with wholesome ingredients that nourish your body while satisfying your chocolate cravings. Almond flour provides healthy fats and a dose of vitamin E, while oat flour adds fibre to support digestion. Instead of refined sugar, these brownies are naturally sweetened with dates and maple syrup, offering a boost of antioxidants and minerals. Silken tofu gives them a protein boost and a smooth, creamy texture—without any dairy, eggs or oil. Plus, cacao is rich in magnesium and flavonoids, making these little treats as energizing as they are indulgent. Enjoy them as a satisfying dessert!
    Servings 12 mini muffins

    Ingredients

    • 1 cup almond flour
    • 1 cup oat flour
    • ½ cup cacao or cocoa
    • 1 tsp baking powder
    • 1 package silken tofu 400 grams
    • 8 Medjool dates soaked in hot warm for 10 minutes if hard
    • ¼ cup applesauce
    • ½ cup plant-based milk
    • ¼ cup maple syrup
    • 1 tsp vanilla
    • ½ cup walnuts
    • ½ cup chocolate chips

    Instructions

    • Preheat the oven to 350°F (175°C).
    • In a blender, combine the tofu, dates, applesauce, milk, maple syrup, and vanilla. Blend until completely smooth.
    • In a large bowl, whisk together the almond flour, oat flour, cacao, and baking powder.
    • Add the blended mixture to the dry ingredients and mix well.
    • Stir in the walnuts and chocolate chips.
    • Divide the batter evenly among 12 muffin cups in a silicone pan or lined with parchment holders. The cups will be full.
    • Bake for 30-35 minutes, or until a toothpick inserted in the center comes out mostly clean.
    • Let cool for 10 minutes before removing from the pan.

    Notes

    Feel free to mix up the nuts and chocolate chips—pecans would work great! You can also use all chocolate chips or all nuts. Goji berries would add an interesting twist.
    Experiment with different flours! I tested this with sorghum flour, which also worked well.
  • Puffed PB Chocolate Squares – Version 1

    Puffed PB Chocolate Squares – Version 1

    Puffed PB Chocolate Squares – Version 1

    Sometimes you just need a treat and these definitely fall into that category! My husband loves these and he’s not much into my gf vegan baking. What version I make is dependant on what ingredients I have on hand. I don’t always have cacao paste but if I had to pick, the cacao paste version would be my favourite.

    Ingredients

    • 1/2 cup cacao butter
    • 1/2 cup cacao paste
    • 1/2 cup peanut butter
    • 4 medjool dates soaked for 10 minutes in hot water
    • 1 tsp vanilla
    • pinch of salt
    • 4 cups puffed quinoa

    Instructions

    • Soak the dates in hot water for 10 minutes and then using a fork, mash into a paste.
    • In a double boiler or a large bowl set over a pot of simmering water, melt the cacao butter and paste together, stirring frequently.
    • Once the cacao butter and paste are melted, add the peanut butter stirring well until the mixture is well combined. Remove from heat.
    • Add the vanilla, date paste and salt. Mix well.
    • Add the puffed quinoa stirring until all the grains are equally covered with the chocolate mixture.
    • Press the mixture into a parchment lined 8″ square baking pan. Patting down and leveling the top.
    • Refrigerate until set, about an hour.

    Notes

    Version 2
    Ingredients
    1/2 cup cacao butter
    1/3 cup cacao (or cocoa for a less intense flavour)
    1/2 cup peanut butter
    4 medjool dates (soaked for 10 minutes in hot water)
    1 tsp vanilla
    pinch of salt
    3 cups puffed quinoa
    Preparation
    Soak the dates in hot water for 10 minutes and then using a fork, mash into a paste.
    In a double boiler or a large bowl set over a pot of simmering water, melt the cacao butter, stirring frequently.
    Once the cacao butter is melted, add the cacao and peanut butter stirring well until the mixture is well combined. Remove from heat.
    Add the vanilla, date paste and salt. Mix well.
    Add the puffed quinoa stirring until all the grains are equally covered with the chocolate mixture.
    Press the mixture into a parchment lined 8″ square baking pan. Patting down and leveling the top.
    Refrigerate until set, about an hour.
    Tip:
    Feel free to test the chocolate mixture prior to adding the quinoa and adjust the sweetness to your taste. This can be done with date or coconut sugar.
  • Pumpkin Pie Chia Pudding

    Pumpkin Pie Chia Pudding

    Pumpkin Pie Chia Pudding

    Yum, this one is so good it’s hard not to eat the whole bowl! Try it topped with a little coconut yogurt or add a crunch with some granola. This keeps well in the fridge for up to five days. If you have white chia seeds, feel free to use them or use a 50/50 splits of white and black for a visually stunning pudding!

    Ingredients

    • 1/2 cup raw pecans
    • 1 cup of cooked pumpkin homemade or canned
    • 2 ripe pears peeled (or 1/4 cup date paste)
    • 1 1/2 cups plant based milk
    • 1 tsp cinnamon
    • 1/2 ground ginger
    • 1/2 ground nutmeg
    • 1/4 cup chia seeds

    Instructions

    • Toast the pecans in a small skillet over low heat until golden brown.
    • Add pecans and all other ingredients except for the chia seeds, to a high powered blender or food processor. Process until smooth and all ingredients are combined.
    • Transfer to a medium sized bowl and stir in the chia seeds. Cover and refrigerate for 3 hours or overnight.
    • Eat as is or top with desired toppings. Enjoy!

    Notes

    I like to add a tablespoon of ground flaxseed to my serving to increase my intake of omega-3 fatty acids.